If you want to create a specific calendar for a page with events that pertain to that page and calendar only, you can create a Tagged Calendar and Tag each event to the Calendar.
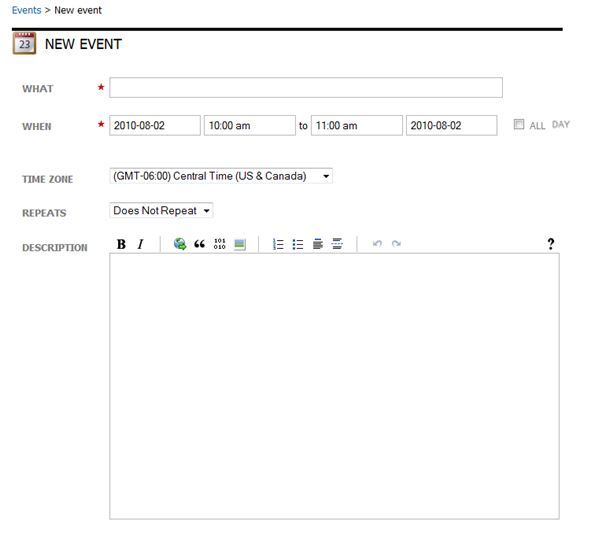
- Hover over My Tools on the Silver Menu Bar and click Events.
- Click Add event.
- Enter the appropriate information for your event.
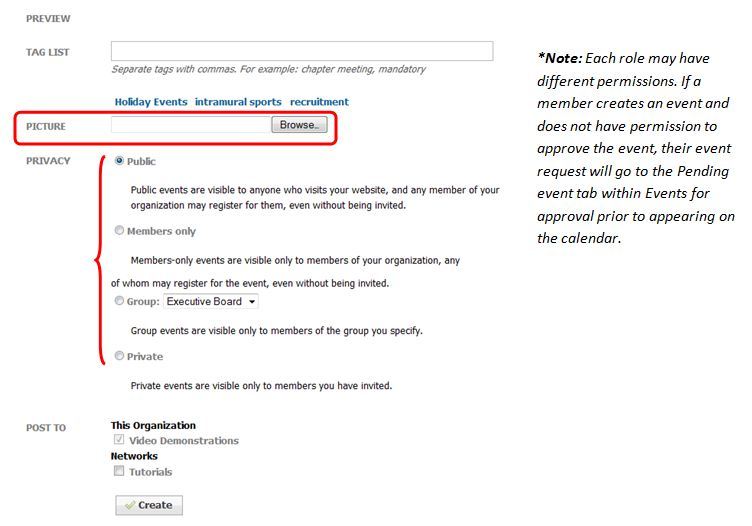
- Tag your event. You can either add a new tag, or click one of the already created tags (Holiday Events, intramural sports, or recruitment).
- Upload a picture for your event if desired.
- Select the appropriate Privacy option based on the descriptions listed (Public, Members Only, Group, Private).
- Click Create.
- Navigate to the page where you want to put the tagged calendar.
- Click Edit this page.
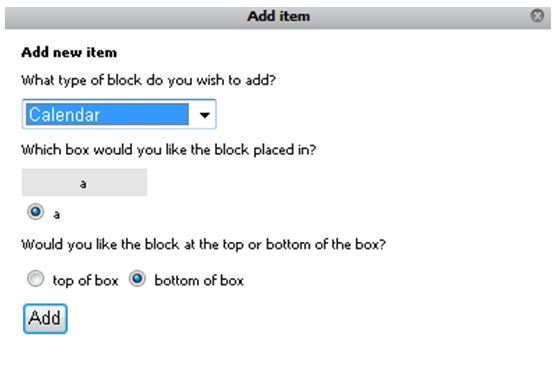
- Click Add Item.
- Select Calendar under the drop down menu.
- Click Add.
- Select the Current Month, or a Specified Month to display on the page.
- Before you click Save, click on the tag that you used for your event.
- Click Save.

*Note: Repeat steps 1-4 to continue adding Tagged events to your Tagged Calendar. You will notice that your Tag will now display as an option for you to choose from.